Wednesday, December 17, 2014

Super Simple Homemade Pasta


BUM-BUM-BUM! I know that this might sound intimidating, but please trust me, it's not. If you can roll out sugar cookies, you can make pasta. No lie! When I started making my own pasta about a year ago, I didn't even own a rolling pin - I used an empty wine bottle to roll out my dough. And it worked great! So there is no need for a fancy pasta machine, and in about half an hour you can have amazing fresh handmade pasta. 

I do have the advantage of owning a pasta machine now, since it was an anniversary gift this year (and a hint that the hubs wants me to make pasta more often). If you make pasta using this recipe and you decide that it's worth the time, effort, and you like to know exactly what's in your food - you can pick up a basic hand crank model like mine for about 20 bucks (or pounds, or whatever your unit of currency is). It still won't save you from the upper body workout that is kneading dough, but hey! The more calories you burn, the more of that fantastic pasta you can eat later.

So, without further adieu, here are the ingredients for my pasta recipe:

2 1/4 cups all-purpose flour (plus a little more for dusting)
3 large eggs


That's it! I swear! That's all that goes into pasta. Or, should I say, it should be. This stuff can be hang dried or refrigerated for up to a week, so even if you don't use this whole batch at once, it won't go to waste. Typically this makes 6-8 servings, depending on your appetite. I made lasagna noodles this time around, and about 1/3 of the dough was leftover and cut into fettucini for the later this week. 


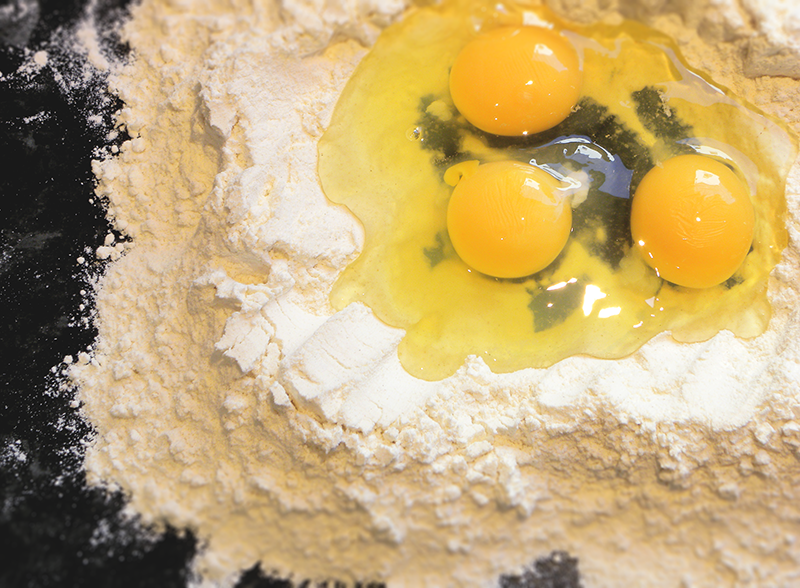
Make sure your work surface is washed clean and dried thoroughly. You can use a large cutting board, but I prefer a nonporous surface like a countertop. Place your flour in a pile, then hollow out the center to create a well. Crack all 3 eggs into the center well of your flour, and whisk gently with a fork (if you'd prefer, you can whisk before pouring into your flour). While stirring with the fork, gradually incorporate flour from the center edges of the well. 


When the flour is about 2/3 incorporated, you can begin mixing with your hand until a ball of dough has formed. This dough will probably be flaking off and quite messy now, and that's when the fun of kneading begins! Knead the dough ball using the heel of your hand. Flatten, fold over, and repeat. Continue this for about 8-10 minutes, until the dough is smooth and stops cracking when kneaded. It's extremely important to knead the dough, since this process gives the pasta its elasticity. 


When your dough ball is ready to be rolled out, clean and dry your work surface, and dust it with a layer of flour. Divide the ball of dough into 3-4 even pieces, and work with one at a time. Dust the top of the dough and your rolling pin (or rolling wine bottle) with flour, and begin rolling! If you're using a pasta machine, you can probably begin rolling in the machine once you have the dough at about 3/8" thickness. If you are rolling by hand, skip the rest of this paragraph and see below!
For machine rolling, start on the lowest (biggest) setting, #1, and each time the dough is rolled through, increase the number by 1. I like my lasagna noodles to be a #6 thickness, and my linguine to be a #7. Unless you're making angel hair pasta, I don't think it's really necessary to roll anything out to the thinnest setting, but that's a personal preference. I like a little substance to my pasta. Then you can either use one of the cutting wheels on your pasta machine, or remove your pasta and cut it by hand (instructions below).

For hand rolling dough, roll into a large flat sheet of desired thickness - about 1/8" is usually good. Dust the top of the pasta sheet well with flour, then fold over in half. Repeat until you have a log shaped roll of pasta. Then, using a sharp knife that is lightly dusted in flour, simply slice your log into the desired thickness. Here's a good little demo video, in case you'd like a visual for this process. Shake out your cut pasta so that it doesnt stick together, and dust with another tbsp or so of flour if you're not planning to cook it right away. 


Simply repeat this process (whether by hand or machine) for the rest of the remaining dough, and voila! The first time I made this, I think it took about 20 minutes, so please don't be intimidated - give it a try! You'll never want to buy store-bought pasta again.


Tuesday, November 11, 2014

Pumpkin Spice Pudding Cookies


I don't usually bake. Around Christmas time, I go into a one-weekend frenzy, and that's the extent of my cookie baking for the year. I don't know what's gotten into me lately, but I can't put down the whisk and chocolate chips. Also, last week I received the most wonderful care package from my mother in America - chock full of my beloved pumpkin-spice-flavored everything.
I had two packages of pumpkin spice Jello instant pudding mix, and I wanted to use it to make something besides pudding.

Timeout - let me explain American pudding. And let me explain what pudding is over here in England: apparently, it's a general blanket term for dessert. Anything and everything that could be considered the dessert course after a meal, is "pudding".

In America, pudding is a goopy, sweet, custard-y type dessert. It's often in little cups (like yogurt) for lunchboxes. It's pretty much just sugar, milk, and gelatin, and it's great. Especially the pistachio (and pumpkin spice) varieties. (PS - Mom - please make pistachio pudding cake next time I visit).

I couldn't find exactly what I was looking for as I browsed all of the pumpkin spice recipes on Pinterest for inspiration. I knew I wanted to make a cake, or a cookie, and I wanted it to be simple. One bowl, basic ingredients. And, obviously, I wanted it to be pumpkin spice flavored.

So I combined a few easy-to-interpret recipes and, lacking the measuring cups I needed (oh, that's right, everything is measured by weight in recipes over here, so measuring cups aren't a thing), I used a small coffee cup as my measuring device. Even if the measurements aren't spot on, I figure the ratio will be correct. The result? Gooey, chocolatey (optional, but highly recommended), fluffy cookies with a crispy crunchy exterior, and the beloved pumpkin spice flavor. Ding Ding Ding! We have a winner. You're looking for a consistency that's identical to chocolate chip cookie dough when you're done (and not the ready-made packaged kind, that's hard, but the homemade kind... it should be sticky). So, please forgive me if the flour measurement is a little off. I'd start with the 1 1/2 cups in the recipe, and add up to an additional 1/2 cup if needed. The good thing about this recipe is that it should be pretty forgiving on exact measurements, because the pudding should stabilize it a little. So if your cookies are cake-ier or crispier than you'd prefer, you can just adjust the measurements next time you make it.


I'm assuming that the general recipe here would work for any flavor of Jello pudding that you have on hand. I bet plain old vanilla would be great, as would caramel. It's virtually limitless! Knock yourself out. If you're in the UK and you want to get your hands on some Jello instant pudding, check out the American aisle/section at your nearest Tesco's. I know that my local [big] Tesco's has several types at the moment. If not, Amazon is usually a sure bet for hard-to-find American grocery items on this side of the pond.


Friday, November 7, 2014

Dinner in a Pumpkin


It's a wonderful time of year, when we can turn decorations into food. And what a superfood it is! Pumpkin is extremely high in fiber, low in calories, and is a jackpot for vitamins C & E. Not to mention, beta carotene.


If you're sick of pumpkin soup, pumpkin spice lattes, and pumpkin ravioli (a personal favorite of mine), here's a brand new pumpkin recipe - and it doesn't even require a pot to cook it in! Pumpkins are mother nature's slow cooker. Simply clean out the pumpkin, saving the seeds of course, and stuff it full of yummy seasonal ingredients. I used leftover roasted chicken, and this small sugar pumpkin quickly turned into a hearty meal that could feed up to 4 people. You could easily use beef or sausage in place of the chicken, or even omit the meat for some black beans.


Wednesday, October 22, 2014

Cuban Black Bean Soup


I love a little grain-free, clean eating alternative to Taco Tuesday. This Cuban black bean soup has tons of flavor, spice, and is great for colder weather. And the beans make it so filling, that this soup is definitely a meal.


And don't forget the toppings! A little fresh cilantro, maybe some salsa, or plain yogurt (as a healthier alternative to sour cream). I love a little jalapeno, too, to spice it up! And if you're still craving that taco crunch, crush some tortilla chips over the top, or scoop up the broth with a warm tortilla. To keep even more with the Taco Tuesday theme, put a variety of toppings on the table and let everyone personalize their own bowl. Dig in!


Saturday, October 18, 2014

Technical Difficulties

I'm not the most tech-savvy,  but I do know my way around most computers. I'm a little bit angry with Google at the moment - you can read my full explanation on my other blog, and I explain exactly what's happened in a little more detail.

Let's just say that, at the moment, you might notice that a lot (almost all) of my photos on here are missing! Don't worry, it's being fixed. I promise. I'm hoping to have the whole thing back to normal by mid-week, next week.

1,000 apologies for the technical difficulties, and I promise to have lots of new yummy recipes posted soon to make up for it!

xoxo
Dani

Thursday, October 9, 2014

Perfect Grain-Free "Pizza"


I don't want to sound like a hipster here, but I was making these vegetable pizzas before it was cool. Actually, I was gluten free before it was cool, too *wink*. I originally made this recipe with zucchini (courgette), when my mom had a freakishly huge crop in her garden one year. I had to come up with a way to incorporate it into nearly every meal, and I was missing pizza a lot in my gluten-free days, and so the veggie "pizza" was born.


This one turned out wonderful with eggplant, and it can easily be made vegan by omitting the cheese. It's not just for vegetarians though - you can add sausage, pepperoni, or more cheese. And don't forget, it is a great diet-friendly pizza alternative for those who are watching their waistlines, so feel free to come back for seconds!


Wednesday, October 8, 2014

Green Goddess Risotto


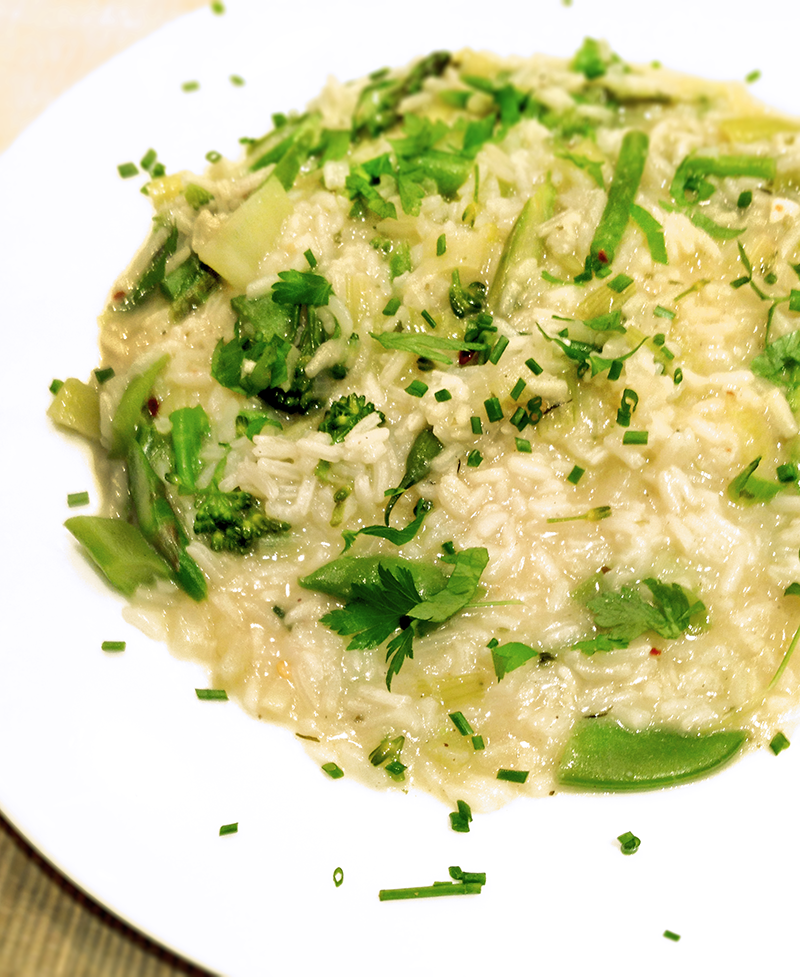
Have you ever had one of those days where you're craving a meal that is light and healthy, but still warm and filling? Well, that's how I felt yesterday, so I whipped up this veggie-laden creamy risotto and had to share my recipe. If you're on the Meatless Monday wagon, throw this in the recipe box (and on the grocery list) for next week!

The best thing about a risotto is that it's such a versatile dish; don't feel limited by the ingredients I used. Any vegetables can lend themselves to risotto, and it's the perfect time of year to incorporate some butternut squash or pumpkin if you've got any laying around. Don't be alarmed if you can't find Arborio rice either; I didn't have any on hand yesterday, so I used a regular short grain rice, and the dish still turned out creamy and delicious, even though it wasn't quite as authentic.


The most important ingredient for this recipe is a good dose of patience, because it takes about 25 minutes to cook, and there's no shortcut around that. But if you persevere and keep stirring, you're sure to have a great meal at the end.


Saturday, October 4, 2014

Secret Recipe: BBQ


My so-called secret recipes are, for the most part, only a secret because I don't measure what goes into them. It's sort of like a grandmother's recipe that calls for 'a little of this, and a little of that.' From making these dishes over and over, and tasting as I go, I've got a sort of basic formula on standby when I need it. I simply try to start with the same ingredients each time, and aim for a familiar flavor. Tasting is the key in these measure-less recipes, and can be easily adjusted depending on one's own mood (sweeter, spicier, etc). Here's my basic formula for a BBQ spice rub and sauce - I make big batches and season everything from chicken to pork to steaks and ribs with this classic seasoning.

1. Brown Sugar
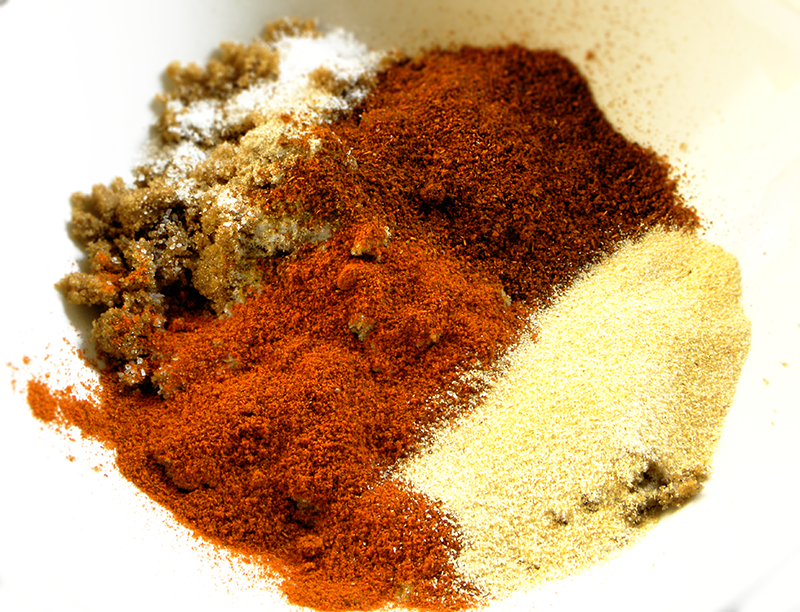
Brown sugar is key to a good rub and sauce. My personal blend of spices is usually a little on the hot and fiery side, so the sweetness and depth of molasses balances everything out really smoothly. I usually opt for dark brown sugar, which has a higher molasses content (and is vital for a rich and dark BBQ sauce). As a general rule, brown sugar should make up about 1/3 to 1/2 of the volume of a BBQ spice rub.

2. Chili Powders
There are 3 basic types of chili powders that should be included in a BBQ spice rub, for optimum flavor and balance: sweet, smoky, and spicy. I use a sweet paprika, a mild smoky chili powder, and an Indian hot chili powder for mine. Chili powder is, next to brown sugar, the most heavily used ingredient(s) in a BBQ rub, so make sure you have plenty on hand! Chili powders should comprise 1/3 of the volume of your rub.

3. Salt
Finely ground sea salt is perfect for this rub and sauce. It has a higher salinity than table salt, and lacks that medicinal aftertaste of kosher and iodized salts. I prefer it for all of my cooking, so naturally it's what I use in my BBQ. I recommend tasting as you go with this one - it is easy to over-salt, so add it gradually and slowly.


Other ingredients I use in my spice rub include: 
Granulated garlic - fresh garlic can't be incorporated as evenly, so I use the powder version here
White pepper - I use more of this than black pepper, which tends to burn during the cooking process
Black pepper (freshly ground) - a little bit goes a long way
Ground cumin - this adds a really nice southwestern-style flavor to the rub

Marinade.
Rinse with cold water and thoroughly dry your cut of meat with paper towels. Rub that spice mix in! I make a crust on the outside of all sides of the meat, and really pack it on as tightly as I can until it won't stick anymore. I recommend refrigerating for 8-12 hours (sometimes, for my ribs, I marinate one or two days in advance, so that the spice rub flavor has plenty of time to penetrate the meat).
Even if you only have an hour or two to let it sit, make sure you give all of those flavors plenty of time to sink in. 

Low and Slow!
Be patient. Good barbecue takes a long, long time. The tenderness of the meat you are cooking relies on cooking at a low temperature (200F, or 100C) for several hours. For a full rack of ribs, this means 6-8 hours mininum. The pork loin pictured here took about 4 1/2 hours. Don't worry, it won't be overcooked as long as you keep your temperature low. Make sure to let the meat rest after cooking, before you cut into it - this helps the juices to redistribute before you eat, so that every bite will be juicy and worth all of your time and effort.


The Sauce
Try to make double the rub you will need, because the other half turns into a fantastic BBQ sauce. One part rub, one part brown sugar, two parts ketchup, one part water, and a few splashes of Worchestershire sauce. You can always add and adjust seasoning to your own taste, but this is my general go-to formula. Simmer on medium low heat in a saucepan until it becomes a dark, rich, sweet and tangy sauce. For extra tangy-ness, add a teaspoon or two of apple cider vinegar to the mix. Glaze the meat with this sauce about half an hour before it's finished cooking, and it'll be just perfect. If you have leftovers, this sauce freezes really well and can be defrosted year-round for summery barbecue flavor!


Now, go out into the world and create your own signature BBQ! And let me know how it turns out!

Wednesday, October 1, 2014

Spicy Tuna Rice Bowl


If you're sushi lover (like me) who doesn't always have the time/equipment/expertise to perfect that beloved spicy tuna roll at home, then you're going to love this rice bowl.

I love how simple and delicious rice bowls can be - and they're great for those days when you have a bunch of random ingredients in the fridge and pantry that need to be used up. This recipe takes all of the flavors from one of my favorite sushi rolls, and turns it into a vegetable and protein packed dish in about 10 minutes. It doesn't get any simpler (or tastier) than this for a quick and healthy mid-week meal!

This would also work really well with leftover or canned salmon, or if you would prefer, omit the fish altogether and toss your vegetables in the spicy marinade!


Tuesday, September 30, 2014

Entertaining 911: The Crostini

This is the first in a little series I'm going to be calling "Entertaining 911" : it's a survival guide to the ins and outs of everything from drinks to dessert. To find more articles in the future, click on the tag "Entertaining 911" in the sidebar. 


Plans are hastily made, a doorbell rings. The impromtu cocktail party: there's plenty of wine and spirits, but what about the food?!

Enter the crostini: This little h'ors d'ouerve is going to be your very best friend. Some fresh crusty bread or a baguette, an oven, and almost anything in your fridge can transform into what is essentially a fancy piece of toast. Basically, you will want your bread slices/pieces to be 2 bites - the perfect snacking size at a party. The sky is the limit, and the bread is a blank canvas waiting to make your lack of preparedness a thing of the past. Top it with whipped goat cheese and freshly cracked black pepper, some caramelized onion with figs, or the recipe for roasted tomatoes below.


Roasted tomatoes are one of my all-time favorite snacks. The natural sugars of these sweet little tomatoes caramelize when roasted, and fresh rosemary creates such a nice balance to the salty-and-sweet flavor combo. When they're sitting on top of some toasty, garlicky bread, it's a match made in bite-sized heaven.